Bake With Me: Caramel Cupcakes

Morning Beautifuls,

I had a craving for cupcakes the other day – not sure where it came from, but all I really wanted was a cupcake. In particular, a vanilla cupcake with some sort of caramel icing.

Which every shop decided they would not have.

And yes, I was been picky.

So I decided to create my own cupcakes, going home and rifling through the cupboards to make this cupcake of my dreams.

Let me tell you, I think I found it!

Just between you and me, I may have eaten between six and eight of them over two days. They were just really good!

So good that I just had to share them with you! Honestly, these cupcakes were super easy to make, and surprisingly fast! The vanilla cupcake itself was the softest and smoothest cupcake in the world (and I may have eaten a few without icing as I iced some).

I did a lot of cupcake eating in those days, let me tell you that!
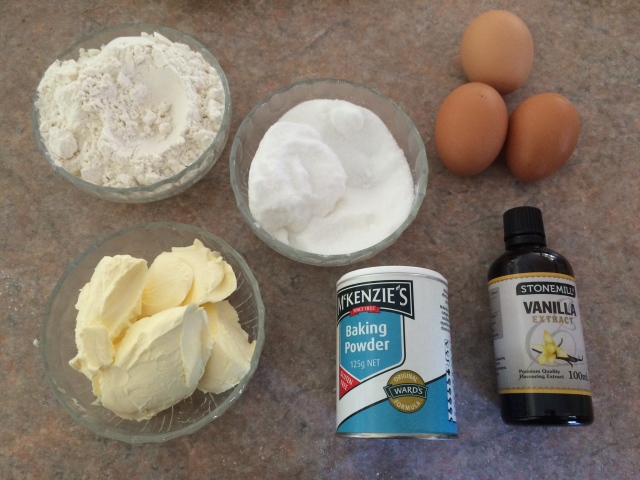
IMG_9135

What you will need:

  • 150g butter (at room temperature) or margarine (that doesn’t have to be at room temperature)
  • 150g caster sugar
  • 3 eggs
  • 150g self-raising flour
  • ½ tsp baking powder
  • 1 tsp vanilla essence

In a mixing bowl, cream your butter/margarine and caster sugar until they turn light and fluffy. That seems to be your basic cupcake step, right? Once its fully mixed, add the three eggs, one at a time. I like to turn my kitchen aid/mix master down extremely low and add one eggs, turn it up to about medium until it is mixed in and then repeat with the remaining eggs. For me, this just seems to be the best way to mix the eggs and create a spongy, light cake (or cupcakes!). Next, add the rest of the ingredients (flour, baking powder and vanilla) and mix until the mixture turns a light, creamy colour. This can take between 3-4 mins!

Then comes the fun part! Pick your super awesome patty cases and spoon the mixture 2/3 of the way of the cases you picked! Pop them in a 180oC oven for 18mins or until slightly browned and ‘bouncy’. Then, if you are impatient, you can munch on one while making the icing.

For the icing, I tweaked a butter cream recipe I used on a regular basis. In this recipe, you mix butter and icing sugar together, adding 10g more icing sugar than however much butter you use. Make sense? I honestly, just measure out some butter and then add however much icing sugar is needed for the icing to form a light, creamy, yummy texture. Then I spooned in two teaspoons of caramel sauce (which is one of the most easiest sauces to make from scratch) and mixed it well into the icing.

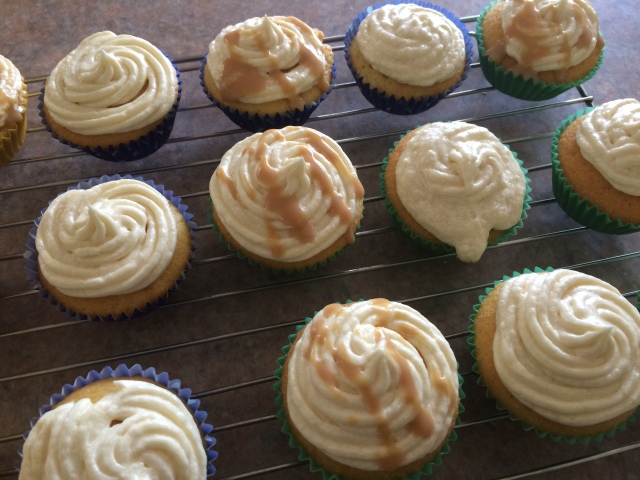
Using a star nozzle, pipe some icing onto your cooled cupcakes, then, using a small spoon, feel free to drizzle some more caramel sauce over the top. This adds to the flavour of the cupcakes and creates a more intense caramel taste!

IMG_9136IMG_9137

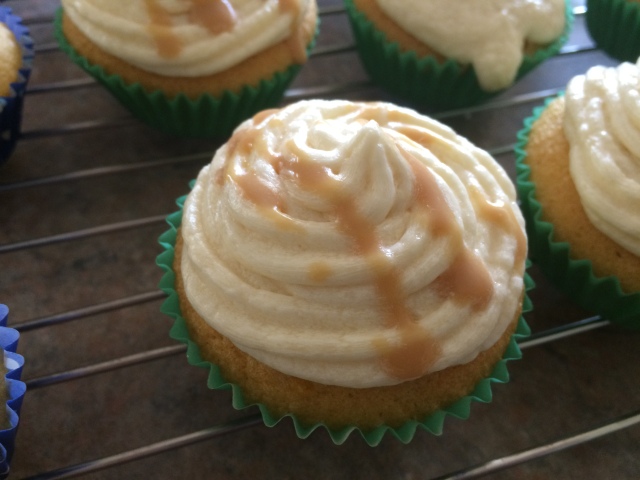
The next step is to enjoy them (all!), or, if you are feeling really, really nice, share them with friends, family or work mates!

How to win friends and influence people – feed them cupcakes! These cupcakes have been the highlight of my week!

Keep smiling,

Kay Anne.

Bake With Me: Maple and Banana Cupcakes

Morning Beautifuls,

I have a thing for banana cakes/muffins/cupcakes. They are literally my favourite thing in the world.

So when I saw this recipe, I knew I just had to try it. I never thought of putting maple syrup and banana into cupcakes, but once I read this I realised it was literally like making banana and maple pancakes into a cupcake! Much excite!!!

The cakes are incredible, although I did have issues with the icing and had to adapt it quite a lot.

But the cakes are incredible! Nom nom! So let’s get into the recipe!

What you need:

  • 1 small banana, mushed well
  • 2 tblspn maple syrup
  • 2 tblspn milk
  • 60g butter, softened (AKA: left out of the fridge for a few hours)
  • 70g caster sugar
  • 1 egg, beaten
  • 100g self-raising flour
  • handful of walnuts, coarsely chopped (for decoration!)

IMG_0856

Preheat the oven to 180 degrees and line your cupcake tin with the coolest cases you can find. I have too many different paper cases at the moment – I need to make more cupcakes! (Well, hey! At least Halloween and Christmas are coming around soon!)

Enough waffling, next mix the mashed banana with the maple syrup and milk in a jug.

In a mixing bowl, beat butter and caster sugar together until they are light and fluffy. Then add the egg and mix it well. Sift in half the flour into the sugar and butter mixture. Fold until just mix. I added the rest of the flour into the banana mixture, mixed that well, and then add that into the butter mixture and fold in.

Spoon the mixture into the paper cases and cook for 18-20mins or until risen and golden. Let cool REALLY WELL before you start the icing.

Now, I’m going to share with you my frosting over the book frosting as I didn’t like the book one – it was too buttery and too syrupy so I adapted it slightly.

I blended 150g with 8-10tblspn of icing sugar, 1 tsp of vanilla extract and 3tblspn of maple syrup. Beat until smooth and creamy. The amount of icing sugar depends on the consistency you would like of the frosting. I then used a star piping nozzle to pipe the frosting, sprinkling a few of the chopped nuts on the top.

Yum!

IMG_0859

Keep smiling and bake often,

Kay Anne

Bake With Me: Rainbow Cupcakes

Morning Beautifuls,

I got creative! Cupcake creative!

I adore the idea of edible rainbows but always get scared by how hard cakes look especially when they have block colours and intense swirls.

So while making my newest batch of cupcakes on my annual cupcake baking day, I decided to try my hand at swirling rainbows. All you need is your favourite vanilla cupcake mixture ready to go, food dyes (preferably red, yellow, green and blue but you can also just use red, yellow and blue) and a few bowls and spoons.DSC04765Split your mixture into four bowls and add four to eight drops of the different colours into the mixture. The amount of dye you add depends on how vibrant you would like the colours to be. Make them a bit darker than you would like as they fade a bit when cooked.

Once you’ve mixed the dyes through so that the batter is a consistent colour, use teaspoons to add each colour in a patty case. Once you have added all the colours, use a toothpick to swirl the colours together slightly! I emphasise the slightly as if you mix them too much, all you will have is a mess and the colours won’t be as distinct.DSC04767 DSC04769Bake them in the oven for around 20-25 minutes or until they are spongy in the middle! Marvel at the amazing colours!DSC04770Now comes the best part! Decorating!

I decided to go for a simple vanilla butter icing, mixing 2 cups of icing sugar with 250g butter and 1 tsp of vanilla essence. Whip the butter until it is light and creamy before adding the sugar and vanilla essence. I love this icing as it is creamy and tasty but also exceptionally easy to pipe.

Which is exactly what is coming next.

I used two – or three – different designs for these cupcakes, all that are simple, easy and awesome looking:
The first is a rose swirl sprinkled with hundreds and thousands. This is easy to do, just start from the outside of the cupcake and swirl the icing inside. Then, before the icing stiffens, sprinkle it with a bit of colour.
The next is a diagonal swirl with cute coloured ball bearings on top. I have no idea where I got these from – I have had them for a while and love them to pieces – but I thought they worked perfectly with the rainbow effect of the cupcake.
Finally, I took the previous decoration and added a bit of swirled colour. This. took. forever. But it made for an incredible design! Add a few drops of colour onto a plate and using a toothpick swirl it in the cupcake icing before you add the ball bearings. Mix swirls randomly to create the rainbow-ed effect and then stretch those stiff shoulders!DSC04778DSC04780I have to admit, I love these cupcakes to pieces! They have to be the most amazing ones I have done so far! Super, super happy!!!

Try your own cupcakes and enjoy the rainbow explosion in your mouth!

Keep smiling and bake cupcakes,

Kay Anne

Bake With Me: Cupcakes for Two!

Morning Beautifuls!

I get jealous of cupcake shops.

There. I said it.

All those amazing looking cupcakes with all their different decorations and flavours make me feel all ‘ughy’ inside. They all look so incredible, it takes a great effort for me not to buy all the flavours and try them all out. And it annoys me that I can’t make one of each at home to try for myself.

I mean, when you make cupcakes you always have to make a mass amount, usually 12, in one batch of the same flavour.

That doesn’t give you all the different flavours to taste – just 12 cupcakes of the same flavour! Ugh!

But I had finally had enough. I had to try it. There had to be a way to make one cupcake and try 12 different cupcake flavours and styles.

Right?

Maybe, but I still haven’t found it. The next perfect thing I came to was narrowing the recipes down to making two cupcakes. In my excitement, I tried four different flavours of cupcakes, making two of each.

Anyway, I thought I would share my near perfection to you anyway, as they do taste good and if you invite a friend over you can try one of each (or keep them all to yourself for later!).

Note: All these cupcakes can be cooked at 180 degrees for 15-18mins. 

DSC03984

1) Carrot Cupcakes with Maple Syrup Cream Cheese Frosting

I thought I would start off with a nice carrot cupcake, something simple and easy. Plus I had a slight craving for carrot cakes.

To make these cupcakes mix 1/4 cup plain flour with 1/2tsp cinnamon, 1/4tsp baking powder and 1tbsp of sugar. In a separate container (e.g., a glass cup), mix 1/3 cup carrots with 2tbsp milk and 1/4tsp vanilla extract. Once it is well combined, mix into the dry mixture.

For the icing, I used cream cheese frosting (buy it from the shops or add a bit of icing sugar into cream cheese) and then added a few drops of maple syrup. Oh. My. Gosh. I feel deprived on the fact that I have never tried maple syrup in frosting because it is delicious! Absolutely amazing! The just sprinkle some pecans on top and yum!

DSC03988

2) Raspberry Cupcakes with Vanilla Cream Cheese Frosting

Next were some raspberry cupcakes. We have fresh raspberries in our garden at the moment so I thought I would use some to make these.

This one was quite a simple recipe: mix 3tbspn flour with 1/4tsp baking powder and 1-2tbspn raspberries. Add in 1/2tsp vanilla extract, 2tbsp milk and 1tbsp sugar. Simple, simple simple!

Again, topping was cream cheese because at the moment it is one of my favourite icings. I omitted the maple syrup from these ones though as I didn’t think it would work well with the raspberries. I could be wrong though… maybe I’ll try it one day…

DSC03989

3) Vanilla Cupcakes

Vanilla cupcakes! Basics that I thought I should make. Again, quite a simple recipe: Whisk 1 egg white and 2tbsp sugar until combined. Add 1tsp vanilla with 2tbsp melted butter, mixing well. The final step is to mix in 1/4 cup flour, 1/4tsp baking powder and 1 1/2 tbsp milk.

Now, for these cupcakes, I decided to do two different topping decorations and have a bit of fun with it. The first one is just like the raspberry icing just with fresh blackberries substituting for the raspberries.

DSC03998

For the second one, I decided to go more down the chocolate path and make a tim tam cupcake. For this, I cut a tim tam diagonally in half, placing it on top and then crumbling a bit on the side. Of course, you get to eat the remaining tim tam. Yum! I really love this cupcake – it looks really cute and – ugh! – I think I could eat a million of these.

DSC03995

4) Red Velvet Cupcakes with Chocolate Frosting

The final cupcakes were a bit more of an adventure. After making the tim tam cupcake, I decided to overload a bit more on chocolate. I have never made red velvet cupcakes before (mainly due to the fact that red food colouring makes me extremely ill) but I wanted to give it a try.

For these cupcakes, I melted 1tbsp butter with 2tbsp sugar, stirring until they were combined well. I then added 1/2tsp vanilla extract with 1tbsp milk and one egg white until smooth and creamy. In a separate bowl add 3tbsp and tsp of plain flour with 3/4tsp of coca and 1/2tsp of baking powder. Mix in the wet mixture until just combined.

This icing is just a very simple chocolate frosting with a sprinkle of milk and white chocolate beads.  They looked really cute and, although I didn’t eat any, was told they were pretty tasty!

DSC04002

Hope you are all cupcake-inspired now!

Keep smiling,

Kay Anne.

Mountain Picnic

Morning Beautifuls!!

I have just come back from an extremely sunny, fun and energetic day up the Botanic Gardens located in the beautiful Blue Mountains! It was one of my best friend’s birthday the other week and two of my other friends (plus myself) decided we would have a picnic this weekend to celebrate.

So, the four of us ventured up the mountains, geared with yummy food, warm clothes and very loud, singing voices! Turned out the warm clothes weren’t needed as while we set up our picnic, the sun decided to join us!

DSC02375

As you can see, we decided that the best picnic foods for us today were some sandwiches (egg/lettuce and then turkey/cheese), some carrot and celery sticks and then, finally two containers of cheese twists (which are the most amazing picnic food ever!). All birthdays need a birthday cake, so I baked a few cupcakes for us to gobble up after the sandwiches – opting for a selection of chocolate oreo cupcakes and vanilla cupcakes.

And, boy, did they go fast!!

DSC02374

We then decided to wander around the park for a bit, gasping and gaping at the wonderful array of flowers and the amazing view as the bright sun happily warmed us.

Just take a look for yourselves:

DSC02419 DSC02399 DSC02396 DSC02386

After spending a few hours wandering, we decided to head back home, with the three sleepyheads becoming awfully quiet on the long trip back.

With the weather looking so incredible, I couldn’t help but stop at one of the lookouts we passed on the way home, forcing them out of the warmth to take a look.

DSC02422

This seemed to wake them up as they decided after that to do karaoke all the way home.

Which was fun.

And loud.

And very out of tune.


But hey, that’s what friends do.


Keep smiling,

Kay Anne.