Bake With Me: Carrot and Walnut (Mini) Cakes

Morning Beautifuls,

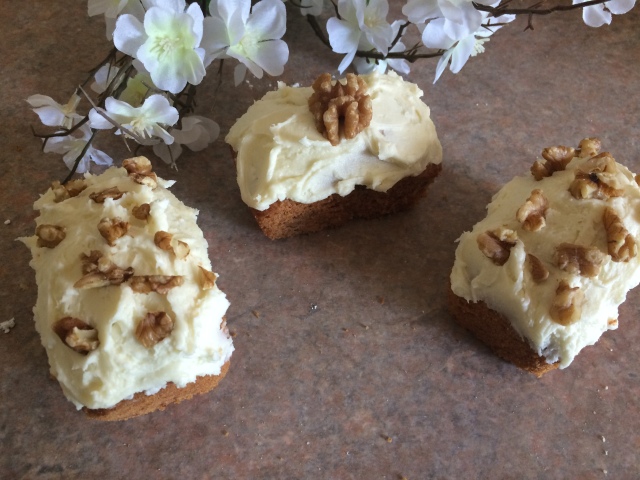
Baking recipes! Yay! This time I want to share with you a super delicious Carrot and Walnut cake – on in my case, mini cakes!

So without any rambling, lets get started!

Ingredients:

  • 1/4 cup oil
  • 1 large egg
  • 56g caster sugar
  • 50g carrot (or 1 medium carrot)
  • 75g self-raising flour
  • 1/2 tsp baking powder
  • 1/4 tsp cinnamon powder
  • 18g walnuts (or just a nice handful) + a few to decorate with!

First step is to whisk oil, egg and sugar together. Once this mixture is smooth and thicker, add carrot and mix through. Add flour, powder, cinnamon powder and chopped walnuts and stir until just mixed. Add this simple mixture into your selected baking pan. I decided to make three cute small loaf tins but you can use a normal cake tin or even cupcake cases to make super awesome cupcakes! Bake in the oven (duh!) for 25-35mins on 180 degrees Celsius  or until an inserted skewer comes out clean! For me, the skewer method is always best just in case the oven is having a nap or something!

While they cool down, I love making the icing. For this, I add butter and sugar into a bowl and mix, adding more sugar than butter until a frosting is made. I would love to give you exact amounts (but I have no idea what they are!). Usually its one to three tablespoons of butter with about 1 cup of icing sugar (but start with 1/2 a cup!). It really depends how buttery or sugary you like your icing!

Spread your awesome icing on top of the cakes and sprinkle some chopped walnuts/add a whole walnut.

Then enjoy!

IMG_9529IMG_9533

Keep smiling,

Kay Anne

Bake With Me: Apple ‘Caramel’ Profiteroles

Morning Beautifuls,

I had a dream that my friend and I went shopping and found a massive section of different flavoured profiteroles. Now, after looking at every single flavour they had – and forgetting most of them as it was a dream – we decided to buy some cupcake flavour and apple caramel flavour ones.

In my dream, they were incredible!

So, when I woke up, the only thing on my mind were apple caramel profiteroles.

So I made it my mission for that day to find a way to make such a thing. (In hindsight, I probably could have just googled for recipes but I want to live in oblivion that they don’t exist).

I like to think that I did – they were amazing. Not so much ‘caramel’ (because I learnt a few years ago that making caramel is my kryptonite and the only time I nearly burnt the kitchen down – long story) but they were definitely apple profiteroles!!!

And I ate too many of them.

So, in my euphoric state (yup, just broadening my vocabulary there), I want to share them with you. So, hang on a tick as I find what device I took my pictures on this time…

Got them!

What you will need:

  • 1 cup water
  • 100g butter, chopped
  • 3/4 cup plain flour, sifted
  • 4 eggs
  • Mashed apples
  • Icing sugar, for topping

In a saucepan, melt butter in the water until the mixture starts to simmer. Add the flour and mix it in quickly. The recipes says to stir it until the mixture leaves the side of the pan – this happened REALLY REALLY fast for me and I ended up having to take it off the heat to stir it in to prevent it from burning. You have been warned.

Let it cool ever so slightly before beating the eggs in – if it is too hot, the eggs will cook and that is not good! I found the best way was to add them one at a time and stir them quickly into the mixture.

Drop 3-5 teaspoons of the mixture onto a baking tray (depending how big you would like them. I did 3 and they were slightly small but very good ‘one-bite’ sizes). Cook at 200 degrees for 30mins and then turn the oven off, leaving the profiteroles in the oven (with the door ajar) for a further 15 mins.

IMG_0874

Once they are cooled comes the fun bit. The recipe didn’t mention this fact (I’m going to stubbornly pretend it wasn’t a baking half-fail), but the inside of the profiteroles came out a bit mushy and wet. So taking the issue into my own hands, I decided to cut a small slit into each profiterole and using a small knife scoop out some of the mushy inside to leave the crisp, golden pastry. This also left more room for extra apple, however did mean it took a teenie weenie bit longer than I expected. Or, you know, 2-3 hours.

For me, it was worth it! I loved the final profiteroles and could even suggest to add some cinnamon to make them extra Christmassy.

IMG_0875 IMG_0877_2

Spritz a bit of cream and serve it up! Just be warned, some people may want more than 3 (like me!) as they really do taste incredible! These have to be one of my favourite things I have baked so far!

Keep smiling and have some fun baking!

Kay Anne