7 DIY Christmas Baubles

Morning Beautifuls,

I’ve been in a creative mood this week on my days off, getting the Christmas spirit through Christmas DIYs.

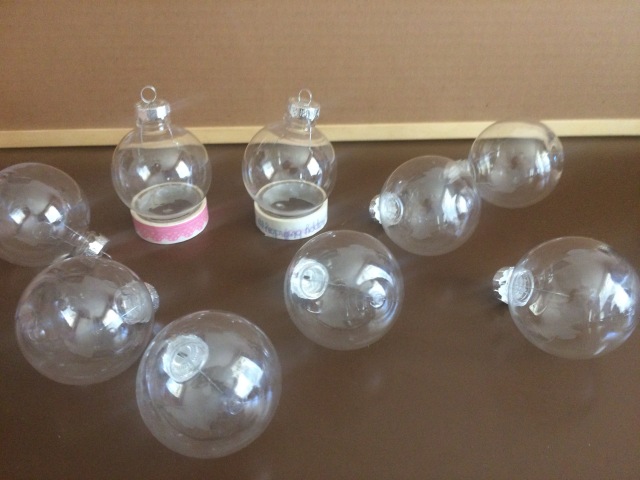
One of my favourite so far that I wanted to share with you a DIY decorative Baubles. Well, 7 different baubles DIYs you can do with those clear, plastic (or glass!) baubles you usually see at craft shops at this time of year.

I managed to grab a pack of 9 plastic baubles from Lincraft for about $3.00 – bargain!
img_2115

Then it was time  to get creative!

  1. Dip-dyed Christmas bauble
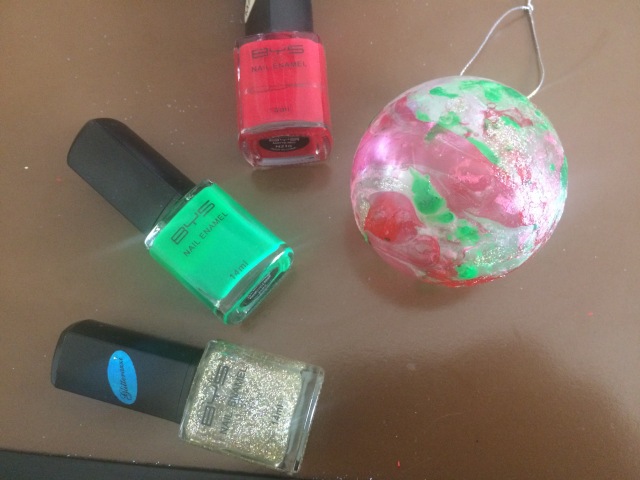
    All you need for this bauble is a bowl of water and your favourite Christmas coloured nail polished. Pour some of your nail colour into your bowl of water and then dip you bauble into the water and swirl it around. The nail polish will stick to the bauble in a colourful design!
    img_2140
  2. Glitter filled baubles
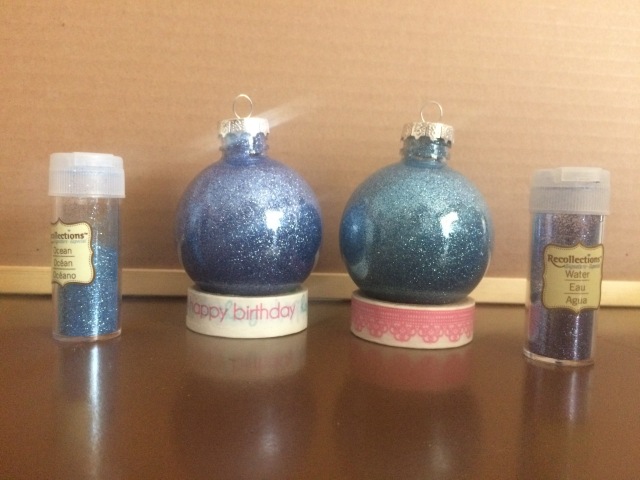
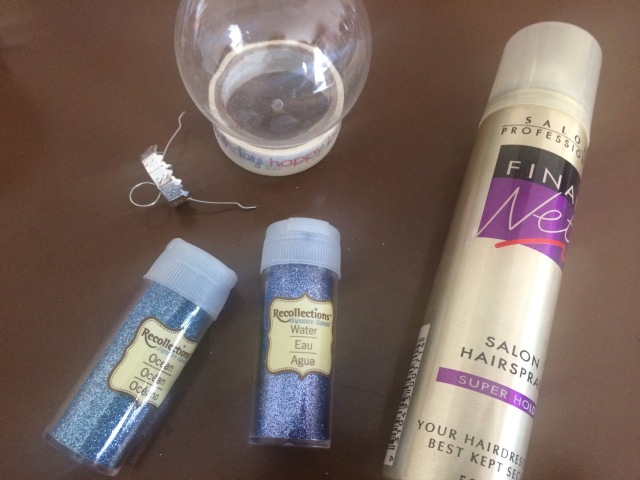
    This was probably may favourite bauble design – hence why I ended up making two instead of one! Firstly, spray the inside of the bauble with hairspray – or some static stick spray (say that ten times fast!) – and then pour a generous amount of your favourite colour glitter into the bauble. Place your finger over the opening and shake it around until the inside is all coated! I really love the final product of this – sparkly and pretty baubles! My camera, not so much! It kept having a bit of a panic over the glitter intensity!
    img_2117
    img_2121
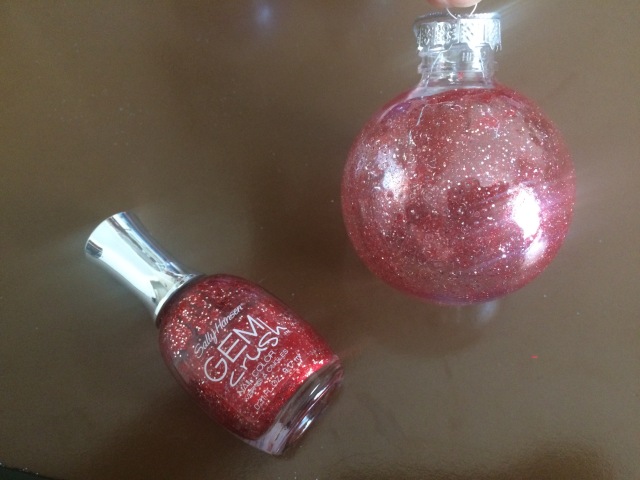
  3. Swirling Nail Polish Bauble
    Another simple bauble design! Pour your favourite colour nail polish into a bauble and swirl it around to create a marbled effect within the bauble. I found that adding reds and glitters created an awesome swirl inside the bauble.
    img_2138
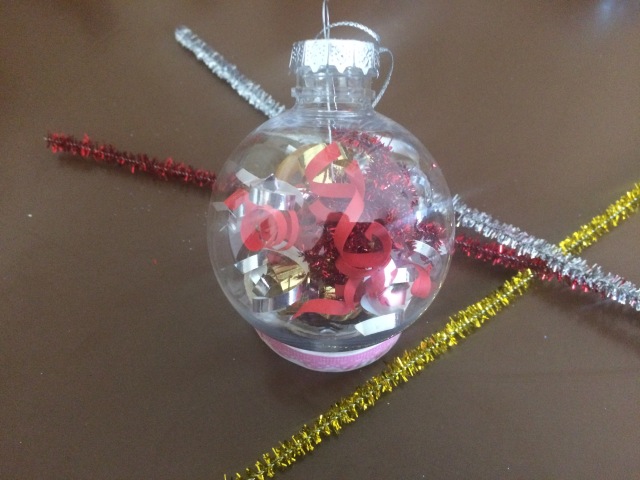
  4. Ribbon Curls Bauble
    You know all those off cuts of ribbon and tinsel that you never know what to do? Well, curl them into swirls and pop them into a bauble. You’ll be surprise how quick they will turn into awesome Christmas decorations!
    img_2143
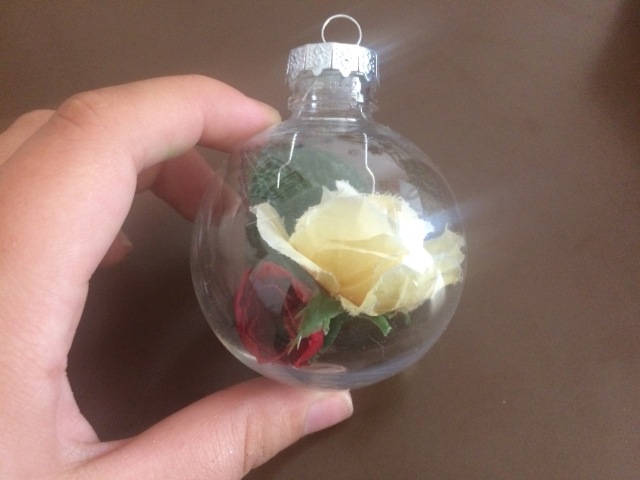
  5. A Rose Garden Bauble
    Create a cute little Christmas garden in a bauble. This one was a bit more fiddly than the others but I really love the final, sophisticated bauble that I ended up with. Using some plastic flowers and leaves, pop them into a bauble and then use a pen – or something similar – to move them around until you are happy with their placement! Ta-da! Cute Christmas Garden bauble.
    img_2125
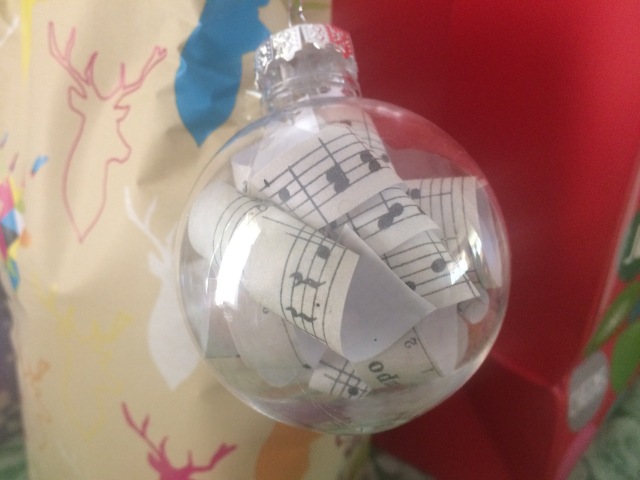
  6. Christmas Song Bauble
    This was a little bit of fun and turned out incredible! All you need is a page of music – or, if like me you didn’t want to chop up a lovely page of music, photocopy! – and a pen/pencil/something that you can curl paper around. Cut the music into strips and wrap around a pen (or similar) to create a cute little curl! Pop them into a bauble and create this awesome Christmas song bauble!
    img_2147
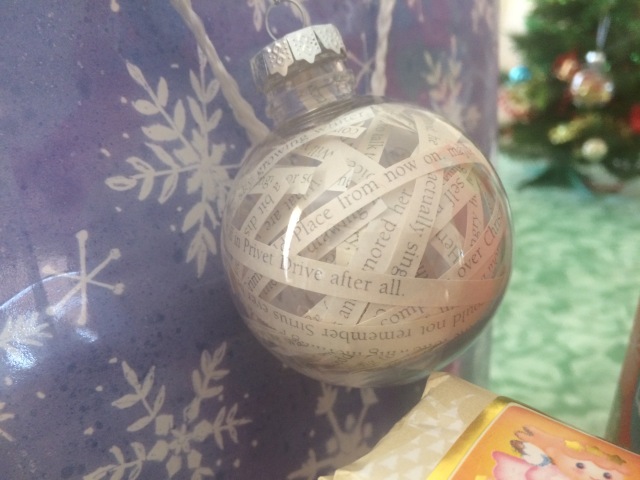
  7. Christmas Book Bauble
    Okay, this may be my second favourite bauble. It took forever though. But I did find a little helpful hack towards the end. Using a page of a book – I used a page from one of the Christmas related chapters in Harry Potter – slice the pages into lines and place into the bauble. I found that curling these lines slightly in the way that they needed to be helped put them in the right places in the bauble. I also needed to use two pages to create this look! But, it was worth it! I love it!
    img_2149

There you have it! My seven different DIY bauble designs! Add them to your Christmas tree, as decorations around you house or even to presents as another special gift!

I hope this gave you a bit of Christmas creativity! Christmas is just around the corner now!

Keep smiling,

Kay Anne

Stocking Stuffers Under $20.00

Morning Beautifuls,

As my Christmas shopping comes to a close for this year and Christmas is around the corner, I thought I could share with you some suggestions for Stocking Stuffers (or smaller presents) for any of you who are struggling with your Christmas shopping.

Because, lets me real, sometimes shopping for presents is extremely difficult!

I’ve put together a collection of beauty, baking and other random present ideas under $20.00, with most of them also under $10.00 (and all highly recommended by me!).

Enjoy!

DSC05188

  • W7 Eye Colour Palette ($10.00)
  • Rimmel Nail Polish Lasting Finish ($5.00)
  • Maybelline Colour Show Nail Polish ($5.00)
  • Chi Chi Eye Magic Strips ($10.00)
  • Nail Art Artificial Nails ($2.00-$4.00)

DSC05189

  • Simple Mini Products (that also come with cleansing wipes – $15.00)
  • QV Hand Cream ($5.00)
  • Travel Size Perfumes ($10.00-$20.00)
  • Eye Mask ($10.00)
  • Magic Hair Combs (or double hair combs) ($15.00-$20.00)

DSC05191

  • Decorating Icing Kit ($14.00)
  • Christmas Cupcake Patty Cases ($3.00)
  • Christmas Tree Decorations (Whatever you like! Usually around $5.00)
  • Quote Plaque ($15.00)
  • Desk Calendar ($15.00)
  • Gel Pens ($4.00)

That is all of my ideas but have one final picture of all the gift suggestions!

DSC05184

Hope you enjoyed this blog post and good luck with all your Christmas shopping!!

Keep smiling,

Kay Anne.

5 Christmas Gifts in a Jar

Morning Beautifuls,

Its December now! I’m socially allowed to get exited for Christmas! Woohoo!!!

Which obviously means Christmas related blogs! Get ready for an onslaught of them up until Christmas – hopefully every Tuesday, Thursday and Sunday right up until Christmas Eve!!

I have to start off with this post – it only seems fitting! This one has to be one of my favourite blogs ever as I love the idea of gift in jars! They have to be the most amazing idea and can become such creative outlets. I’m so excited to share with you five of my favourite Jar Gifts that I have made!

Now, most of these will work with any sized jars – including finished jam jars! I think glass ones look better than plastic ones and love the ones with slight detail on them or the complete opposite – very plain ones that I can decorate. Just, with both of the baking ones, you may need to tweak the ratios of the ingredients depending on the sizes of the containers. I would recommend a 1 litre container or a half a litre container, but any size works – there just may be a bit of maths included!

But lets get one with the awesome ideas!!! Woohoo!!

IMG_1333

(I don’t know where to start!)

IMG_1340_2

The first one I want to start with is Triple Chocolate Chip Cookies in a Jar. I tweaked this from a few different recipes, so fingers crossed it’ll work out. I’m quietly confident though – I mean you can’t go wrong with chocolate, right? For this one, I had to half the ingredients for it to fit into the jar I picked. However, for the sake of this blog post, I’ll give you the 1L equivalent.

So, all you need to do is layer the ingredients in the following order:

  • 1 3/4 cups plain flour mixed with 1tsp baking powder and 1tsp baking soda
  • 3/4 cup brown sugar
  • 1/2 cup white sugar
  • 1/4 cup cocoa
  • However much is necessary to fill your container of milk, dark and white chocolate.

I found funnel and spoon extremely helpful in getting all the ingredients in the jar, although if you’re a bit more skilled than I am, measuring jugs could work just as well.

In a tag, attach the following instructions:

Preheat oven to 180 degrees Celsius. Empty cookie mix into a large bowl.
Mix with 3/4 cup softened butter, 1 egg and 1 tsp of vanilla essence.
Shape into balls and cook for 11-13 minutes.
Enjoy with a Merry Christmas!

Woohoo!! First jar done! Lets move onto the next one!

IMG_1337

The second baking related jar I made was a Apple Crumble Mix Jar. I think this is a gorgeous Christmas-themed present and it makes a perfect apple crumble! Ugh, my mouth is watering just thinking about it!

What you need to layer:

  • 1/2 cup flour
  • 2/3 cup brown sugar
  • 1 cup oats
  • 1/2 cup flour
  • 2/3 cup brown sugar
  • 1/4 cup oats
  • 2 tsp cinnamon and 2tsp nutmeg.

You can put both sugars and flour together to make thicker layers but I really loved it with the thinner layers. I also had a bit of room at the top of mine – I forgot to check what size the container was before starting – but plan to add some dried fruits – maybe cranberries or sultanas closer to giving it away. I think this would add a lovely christmassy feel and give the apple crumble a different, brighter flavour!

Anyway, for the label:

Preheat oven to 180 degree Celsius.
Peel and slice 4-8 apples and lay them in a baking dish.
Pour contents of jar into a bowl. Mix 1/3 cup of butter and mix until crumbly.
Sprinkle over top of apples and cook for 30mins.
Enjoy warm with ice cream or cream and a Happy Christmas!

IMG_1344

Moving on to other types of jars! The third idea is still baking related but doesn’t include the use of any ingredients (or anything that can make a absolute mess!). All you need for this one is some baking supplies and a cute tin and you are good to go!

What I put in mine are just some suggestions as there are limitless things you could place in this depending on the size and shape of your jar and who you were given it to. It took me a while to figure out this jars contents but in the end I decided with:

  • A variety of Christmas Cupcake Cases
  • Two Christmassy themed cookie cutters
  • Glitter icing pens/tubes

As a stocking filler or a cute baking utilities present, this is a super great idea for that chef in your family who knows every recipe! Plus, if you look around in some of the stores, you would be surprised at the fun little kitchen gadgets you can find. Like Strawberry top removers!

IMG_1346_2

The next jar is a manicure/pedicure set and is a super quick and cute idea with heaps of different things to place and display inside!

Keeping mine slightly simple but still Christmassy and cute, I decided to place into mine:

  • Mint scented bath/feet scrub crystals
  • Mint scented nail polish remover
  • A pair of nail clippers
  • A cute peach scented tea light (side note: peach scented things smell amazing!)
  • Sparkly red nail polish (you could go for any colour but I thought red sparkles just screamed Christmas!)

After placing them inside, and finally finding another use of my ability to use chopsticks, I then covered the tin lid with a cute red and white polka dotted material cut into a circle. To this I attached a nail file in the shape of a star which I thought really added to the Christmas feel and still encompassing with the theme.

IMG_1342_2

Final jar is more of a sentimental jar that I really wanted to make for one of my friends. She is really into quotes and when I had this idea I couldn’t believe I hadn’t thought of it earlier – like six years ago. Funnily enough, this jar took the longest for me to make – searching the internet for suitable quotes, collaborating them, printing them out and putting them all in the jar took longer than I expected. After adding a bit of wasabi tape for decorating and using silver glitter letters to write ‘A Jar Of Quotes’, the jar was finally finished.

I am in love with the final result. I was hoping to add 200ish quotes into the jar but they didn’t all fit – which shows my lack of spatial awareness. You could do 52 quotes – one for each week of the year – or even 365 – one for each day of the year – or, like me, just add as many as your jar will hold. I have to admit, I am the most proud of this jar.

IMG_1335

Anyway! I really hope you enjoyed this blog and it gave you some inspiration for Christmas gifts! I really think they are an incredible idea and love using them at Christmas time. Some can even work for birthdays!!

Keep smiling and get excited for Christmas!!

Kay Anne

4th Blog of Christmas: Gifts

Morning Beautifuls!

It feels weird to write two blogs in one day but I am so excited for this one! It has to be one of my favourites out of the whole 12 days (Yes, I think I have them all organised now! Super excited). So, I really want to just get on with it!

On the 4th blog of Christmas and the blog posts to see…

THESE ARE SOME OF THE COOLEST HOMEMADE GIFTS I HAVE MADE FOR A WHILE! I am tempted to keep them all to myself… But I am extremely excited to show them all to you! Ready? I am sooooo pumped!!!!!!

As I said above, all of these are handmade gifts, really simple and really fun to create and give away (if you can bring yourself to do that). All quite cute little gifts, either as an individual present or paired with something else. Personally, they are all neat individual gifts for friends!

The first is a ‘Let It Snow’ Candle. For this candle, I bought a balloon shaped candle holder, filled it with blue acrylic crystals (that are used usually as vase fillers) and then placed a tea light in the centre. For the decorations around the glass, I sprayed it with fake snow (‘Santa Snow’) and placed a few silver Christmas trees and snowflakes stickers around. Presto! Gift number one complete!

DSC03191

DSC03192 DSC03189

My second homemade gift I wanted to show you is a homemade ‘Candy Cane’ Body Sugar Scrub. This is a really cute beauty related gift and not only is it quite easy to make, it makes your house smell incredible! The white layer is sugar mixed with scented oil and turns into a gorgeous body scrub that feels incredible on the skin and makes you skin feel fresh and clean! Mix a bit of crushed candy cane and red food dye in with the sugar to create the pink/red sugar and layer them up in a candy-cane effect!

DSC03193DSC03196 DSC03193

Thirdly, is a recipe in a jar. I made these last year for some friends and they are incredible! So, of course, I decided to make them again. I call them ‘Very Merry Christmas Brownies’. In the jar is all the dry ingredients needed for some of the most amazing brownies you will ever taste. Only issue, is it is a bit fiddly to create – especially with the layers – but I do think its worth it for the final result!

For a 1L jar, the layers are:

  • 1/2 tsp baking powder mixed with 95g plain flour
  • 35g cocoa
  • 75g plain flour
  • 135 brown sugar
  • 150g caster (white) sugar
  • 200g m&ms (I used the mixed colours, but the red and green Christmas pack could also look very festive!)
  • 50g coarsely chopped walnuts
  • For the tag: Pour all ingredients into a mixing bowl. Mix with 150g melted butter and two eggs. Pour mixture into brownie tin and cook on 180 degrees for 25 mins.

DSC03199DSC03200

DSC03201

The final gift I have for you today is a really simple, but super cute idea! It is a hot chocolate snowman! Using some small jars, fill one with jelly sweets, one with hot chocolate mixture and the last with white marshmallows. Stack them together, stick on some buttons, eyes, nose and mouth and tie a ribbon (or two!) around its neck. I decided it really needed a hat, so cut one out of red felt, tying it on with a red thin elastic. Then, for a final touch, I sprayed a the bottom of its body with a tad of the fake snow. Isn’t it adorable?!

DSC03206DSC03211 DSC03209 DSC03207

I really love these gifts! Simple but amazing in my eyes 🙂

See you tomorrow for blog 5. Promise this one will be on time!

Keep smiling and stay festive,

Kay Anne